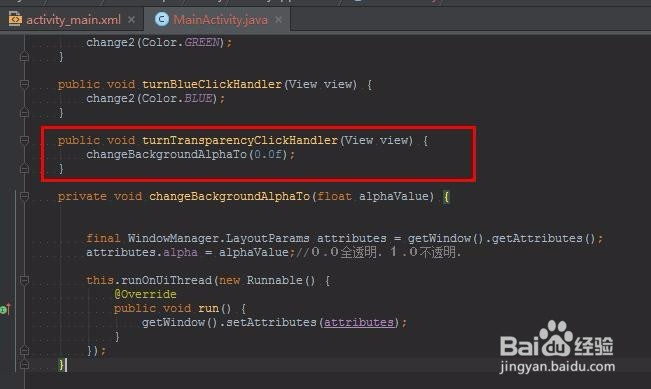
1、本文是通过一个Button岳蘖氽颐按钮来实现更改Activity背景色的功能。工程就使用以前的吧,新增一个按钮“变透明”Co颊俄岿髭de:AndroidManifest.xml:<LinearLayout android:layout_width="fill_parent" android:layout_height="wrap_content" android:gravity="center" android:orientation="horizontal"> <Button android:id="@+id/clickTransparency" android:layout_width="wrap_content" android:layout_height="wrap_content" android:onClick="turnTransparencyClickHandler" android:text="变透明" />

2、在Activity中增加相应的监听事件MainActivity.javaCode:public void turnTranspar髫潋啜缅encyClickHandler(View view) { changeBackgroundAlphaTo(0.0f);}private void changeBackgroundAlphaTo(float alphaValue) { final WindowManager.LayoutParams attributes = getWindow().getAttributes(); attributes.alpha = alphaValue;//0.0全透明.1.0不透明. this.runOnUiThread(new Runnable() { @Override public void run() { getWindow().setAttributes(attributes); } });}
3、在真机运行下这个App在MainActivity.java上点右键,在弹出的菜单中选“Run MainActivity”

4、AndroidStudio会自动将程序部署了真机上(这个需要设置,设置过程在下一篇分享中)。这个App会在真机上安装完成后,自动运行使用Android Studio的截图工具,来获取一张手机上App的GUI。点“Screen Capture”按钮

5、看看获取的图片信息和真机一样,就是大了点
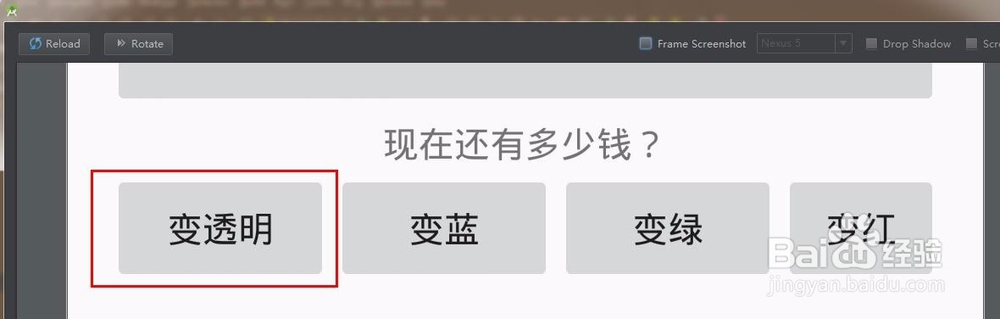
6、在真机上按下按钮“变透明”。然后在Android Studio 已经弹出的对话框,点击“Reload”按钮看到执行了结果了没,是黑的黑的


