本文将讲解一下如何通过NI Vision Assistant CreateLabVIEW VI(视觉助手软件导出LabVIEW VI代码)。因为LabVIEW 是支持VI平台的开发语言,将导出的视觉VI源程序集成到LabVIEW开发环境中运行。
工具/原料
NI Vision Assistant 2014
LabVIEW 2014
Ceate LabVIEW VI
1、此处以NI Vision Assistant 中 Processing Function : Machine Vision-Find Circular Edge为列。

2、选择Tools-CreateLabVIEW VI...。

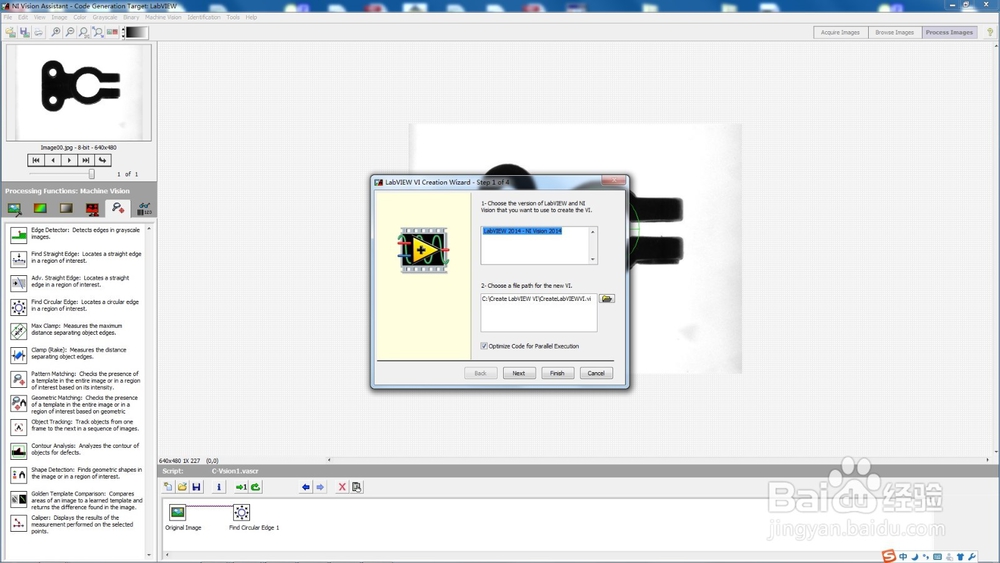
3、1选择开发环境版本(Choose the version of LabVIEW and NI version that you want to use to create the VI ),2选择保存文件的路径和文件名(Choose a file path for the new VI),3选择对并行进程执行进行优化。
4、选择生成LabVIEW VI的脚本(select the vision Assistantversion ):current Script(当前脚本)/Script File脚本文本(此时需要通过路径浏览器 选择新的需要转换的脚本)。

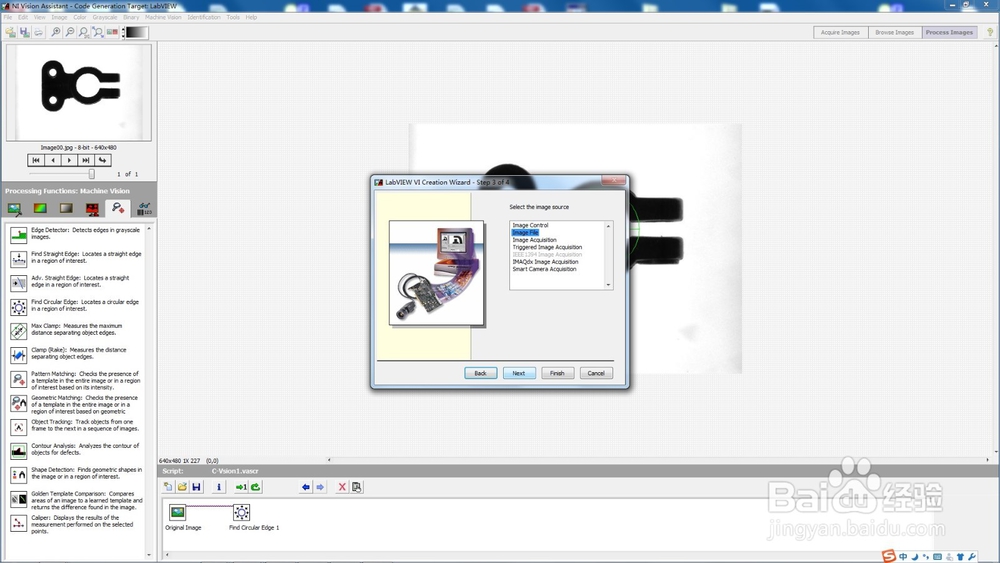
5、选择图像文件来源(select the image source):Image Control图像控件,Image File图像文件,Image Acquisition图像采集,Triggered Image Acquisition触发图像采集,IEEE1394 Image Acquisition火线图像采集,IMAQdx Image Acquisition IMAQdx驱动图像采集,Smart Camera Acquisition智能相机图像采集。
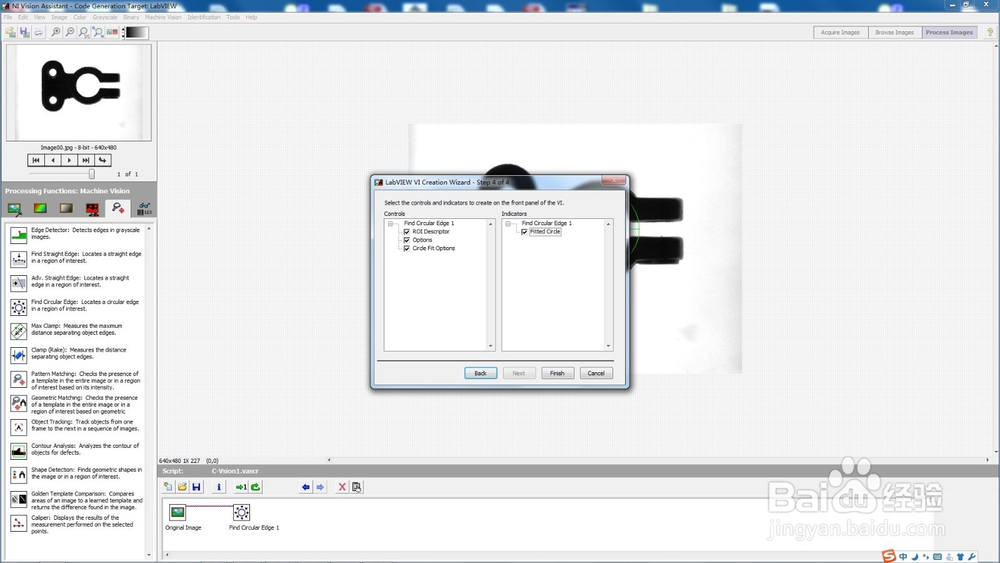
6、选择需要在VI前面板上显示的输入控件和显示控件(Select the controls and indicators to Create on the front panel of the VI)
7、生成LabVIEW的前面板和程序框图如图所示。


8、点击工具栏运行按钮,选择需要处理的图像文件。

9、图像处理返回值保存在Fitted Circle (Find Circular Edge 1)簇显示控件中,根据自己的需求进行提取即可。

